Title:
Galaxy Resin Art in 5 Easy Steps for a Stunning Cosmic Effect
Galaxy Resin Art in 5 Easy Steps
for a Stunning Cosmic Effect
Ever wanted to capture the beauty of the stars in your artwork Galaxy art is one of the most eye catching styles you can create and the best part is it’s easier than it looks. Whether you want to make a galaxy coaster tray wall panel or jewelry this step by step guide will help you bring your cosmic vision to life.
So grab your resin and let’s get celestial.
What You’ll Need
Epoxy and hardener
Black blue purple and white pigments
Fine glitter or mica powder (silver gold or holographic work well)
Mixing cups and sticks
Heat gun or torch
Silicone mold or panel for your piece
Protective gear gloves mask and a level workspace
Recommended Resin:
Pro Marine Supplies Epoxy is a great choice for beginners and gives a glossy finish perfect for space scenes.
Step 1 Prepare Your Workspace and Materials
Set up in a clean level area with good airflow. Lay down a silicone mat or plastic sheet to protect your surface. Mix your according to the instructions and divide it into smaller cups for each color.
Want to learn how to mix resin properly?
Check out our Mixing Guide for Beginners
Step 2 Pour the Galaxy Base
Start by pouring a layer of black pigmented as your base. This represents deep space and helps all the other colors pop. You don’t need a thick layer just enough to coat the mold or panel.
Use your heat gun gently to remove bubbles and spread the evenly.
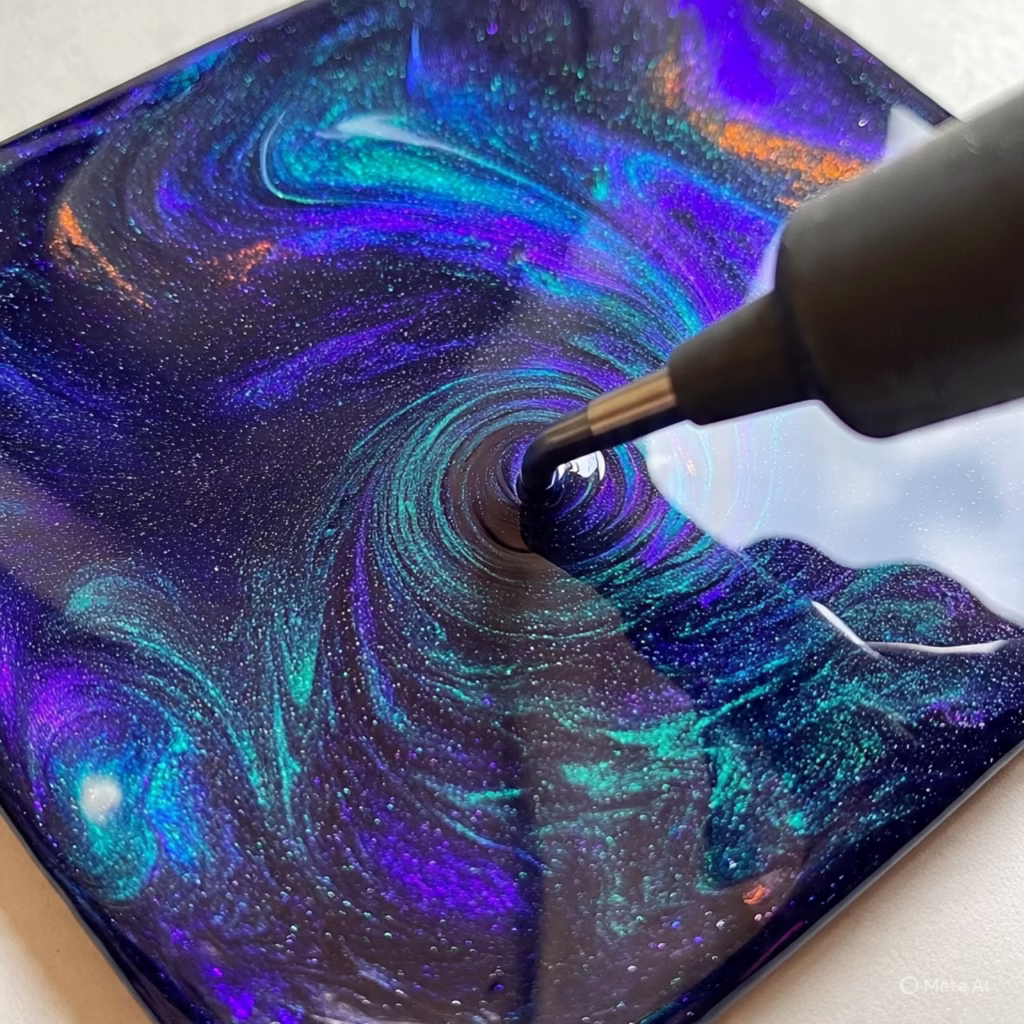
Step 3 Add Cosmic Colors
Next drip in your blue purple and white randomly over the black base. Drag a popsicle stick or stir stick through the colors to create swirling nebulas and galactic shapes.
Pro Tip: Less is more.
Start with small amounts and build gradually. You can always add more color but you can’t take it away.
Step 4 Add Stars and Sparkle
Sprinkle a light layer of fine glitter or use a white paint pen or toothpick to flick tiny white dots for stars. You can even use a bit of glow in the dark pigment to make your galaxy piece shine in the dark.
Looking for premium pigment powders? Check out Black Diamond Pigments for high quality options.
Step 5 Let It Cure and Finish
Let your piece cure flat and undisturbed for at least 24 hours or follow the brand’s curing time. Once cured remove it from the mold and admire your mini universe.
If needed sand the edges and add a final clear coat of for extra shine.
Final Thoughts
Galaxy art is a fun and beginner friendly way to create something truly unique. Every piece turns out different just like real galaxies. Once you get the hang of the technique you can experiment with different shapes layers and even 3D effects.
Want to see more creative resin projects?
Visit our Project Ideas Library or try our DIY Coaster Tutorial next.
Would you like this turned into an Instagram
carousel or Pinterest pin with photo steps? Let me know and I can help format it.
You might to like read this blog
https://manyviral.com/can-trumps-big-beautiful-bill-pass-the-senate/
Leave a Reply