Title
Alcohol Ink Plus Resin Equals Magic Try This Mesmerizing Art Hack
Alcohol Ink Plus Resin Equals Magic
Try This Mesmerizing Art Hack
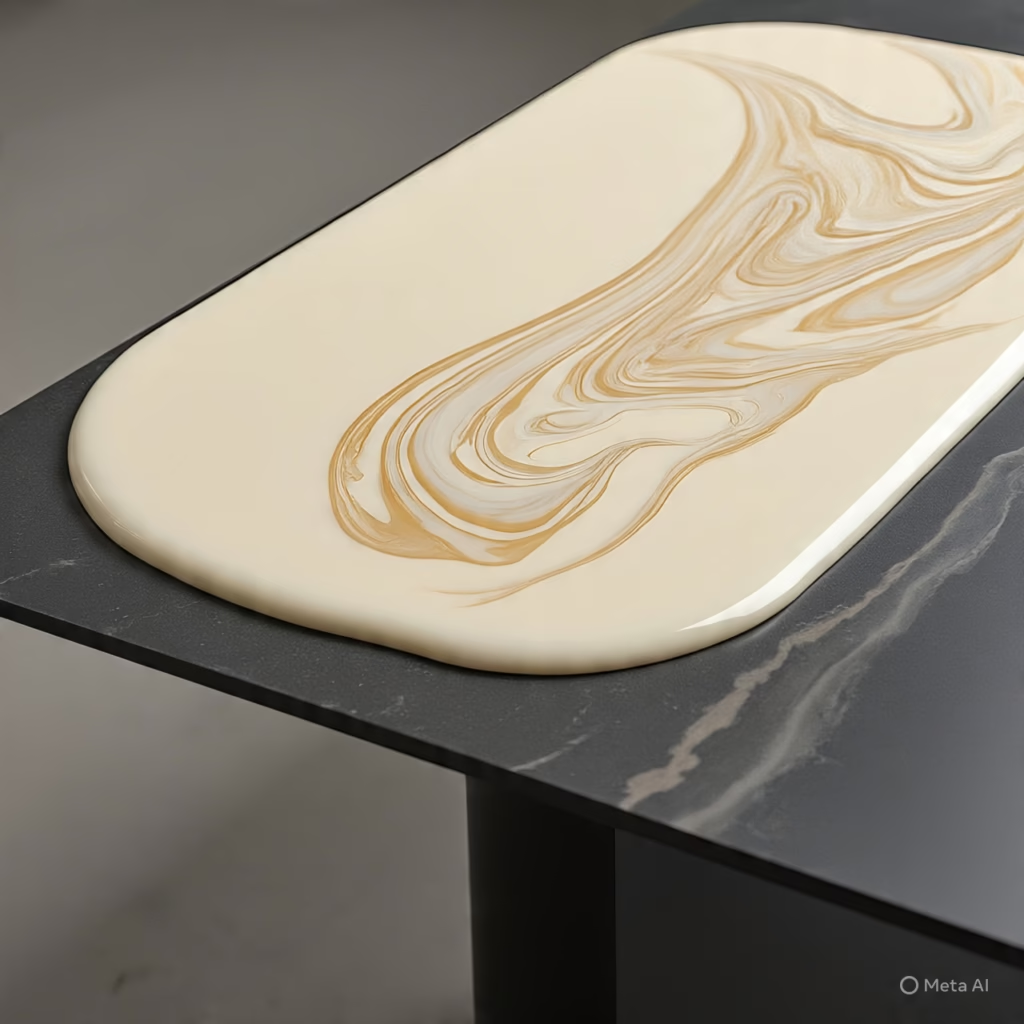
If you have ever poured resin and thought it looked a little flat this is the game changing trick you need Adding alcohol ink to is a quick way to add bold color stunning swirls and depth that looks like art trapped in glass
Whether you are making coasters trays
or abstract wall art the alcohol ink and combo brings out mesmerizing movement and no two pieces ever look the same
Why Alcohol Ink Works So Well with Resin
Alcohol inks are highly pigmented fast drying and very fluid which makes them perfect for swirling and blending in They react with the base and each other to create waves rings cells and unique color transitions
You can use them in clear resin layers
or drop them onto the surface after pouring for that famous blooming effect
Want to master the blooming look Try our 3D Bloom Technique with Inks
Supplies You Will Need
Clear epoxy and hardener
Alcohol inks in your favorite colors
mold or a tray panel
Mixing cups and stir sticks
Heat gun or torch for bubbles
Nitrile gloves and protective gear
Recommended product:
Alcohol Inks by Jacquard work beautifully with and come in bold vibrant shades
Step by Step Magic
Step 1 Mix Your
Start by mixing your epoxy according to the instructions on the label Work slowly to avoid bubbles and make sure your surface is level
Need help with mixing basics? Visit our Beginner Mixing Guide
Step 2 Pour the Resin
Pour the clear into your mold or tray base layer Keep it smooth and even and pop any bubbles using a torch or heat gun
Step 3 Add Alcohol Ink Drops
Drop alcohol ink directly into the surface of the wet resin You can use multiple colors or stick to a theme like blues and golds
Watch as the ink spreads and begins to bloom into soft patterns and rings
Step 4 Tilt or Swirl
For more control use a toothpick or tilt your mold to encourage the ink to move and blend Or leave it still and let the magic happen on its own
Step 5 Cure and Finish
Let your piece cure according to your instructions usually 24 to 48 hours Once fully cured you will have a glassy artwork with flowing ink details
Extra Tips for Best Results
Use less ink than you think too much can overwhelm the resin
Add white alcohol ink for blooming effects and lacing
Try layering ink between pours for added depth
Use metallic inks for a touch of shimmer
What Can You Make
Coasters
Jewelry pieces
Abstract wall panels
Decorative trays
Keychains and bookmarks resin
Looking for project ideas?
http://Check out our Top 10 Alcohol Ink Projects
Final Thoughts of resin
Mixing alcohol ink with truly is magic You don’t need a lot of tools or experience to create something beautiful Every pour is a surprise and every finished piece tells its own story
If you are ready to take your resin art resin
to the next level this is the perfect technique to try
Want more art hacks? Visit our Creative Techniques Library or learn how to make Ocean Wave Art next
Would you like this turned into a video
script or printable one page tutorial Let me know and I can help format it
You might to like read this blog
https://manyviral.com/can-trumps-big-beautiful-bill-pass-the-senate/
Leave a Reply