Title:
Creating Pet Cremation Resin Jewelry to Honor Your Beloved Pet
Losing a pet is never easy.
They’re more than just animals—they’re family members who bring joy, comfort, and love into our lives. One beautiful way to honor their memory is by creating pet cremation resin jewelry. This type of jewelry allows you to carry a piece of your pet with you wherever you go, turning the love you shared into a tangible keepsake.
In this blog, we’ll explore how to create stunning pet cremation resin jewelry, from gathering the ashes to crafting your own personalized piece of art. If you’re looking for a way to keep your pet close to your heart forever, this guide is for you.
What You’ll Need:
- Pet cremation ashes (small amount, usually a teaspoon or less)
- Clear resin (epoxy or UV resin is best for this)
- Resin jewelry molds (pendant, ring, or bracelet molds)
- Mixing cups and stir sticks
- Gloves and mask (for safety)
- Pigments or glitter (optional for adding color)
- Jewelry findings (like chains, rings, or jump rings)
- Sandpaper (for finishing edges)
- UV light or heat gun (if using UV resin)
Step-by-Step Guide to Creating Pet Cremation Resin Jewelry
-
Prepare Your Pet’s Ashes
The first step is to gather a small amount of your pet’s ashes. You only need a teaspoon or less, as it will be mixed into the resin. It’s important to handle the ashes gently, so use a clean spoon or small container to collect them. You can mix the ashes directly into the resin or create a layered effect, depending on your desired design. -
Mix Your Resin
Follow the resin manufacturer’s instructions for mixing. If you’re using epoxy resin, it typically requires a 1:1 ratio of resin and hardener. Stir thoroughly to ensure the mixture is completely blended. If you want to add color to the resin, you can mix in pigments or glitter at this point. Keep in mind that the ashes will naturally give the piece a unique texture, so the color is optional. -
Prepare Your Mold
Choose a mold that fits the jewelry style you want to create. For example, you might want to create a pendant to wear on a necklace, a ring, or even a keychain. Pour a small layer of resin into the mold as a base and allow it to cure slightly (about 1–2 hours). This will help the ashes settle at the right level. -
Add the Ashes to the Resin
Once the base layer is ready, carefully add the pet cremation ashes to the resin. Use a toothpick or small stir stick to distribute them evenly. You can choose to mix the ashes throughout the resin or leave them in a small clump for a more textured effect. If you want a more structured design, you can pour the ashes in layers. -
Pour the Final Layer of Resin
After placing the ashes in the mold, pour more resin over them to fill the mold completely. Make sure the ashes are fully covered with resin. Be gentle when pouring to avoid air bubbles. Use a heat gun or torch to pop any bubbles that may form. -
Allow the Resin to Cure
Let the resin cure for 24–48 hours, depending on the type of resin you used. If you’re using UV resin, you can cure it under a UV light, but epoxy resin requires a longer curing time. Make sure the resin is completely hard before removing it from the mold. -
Finishing Touches
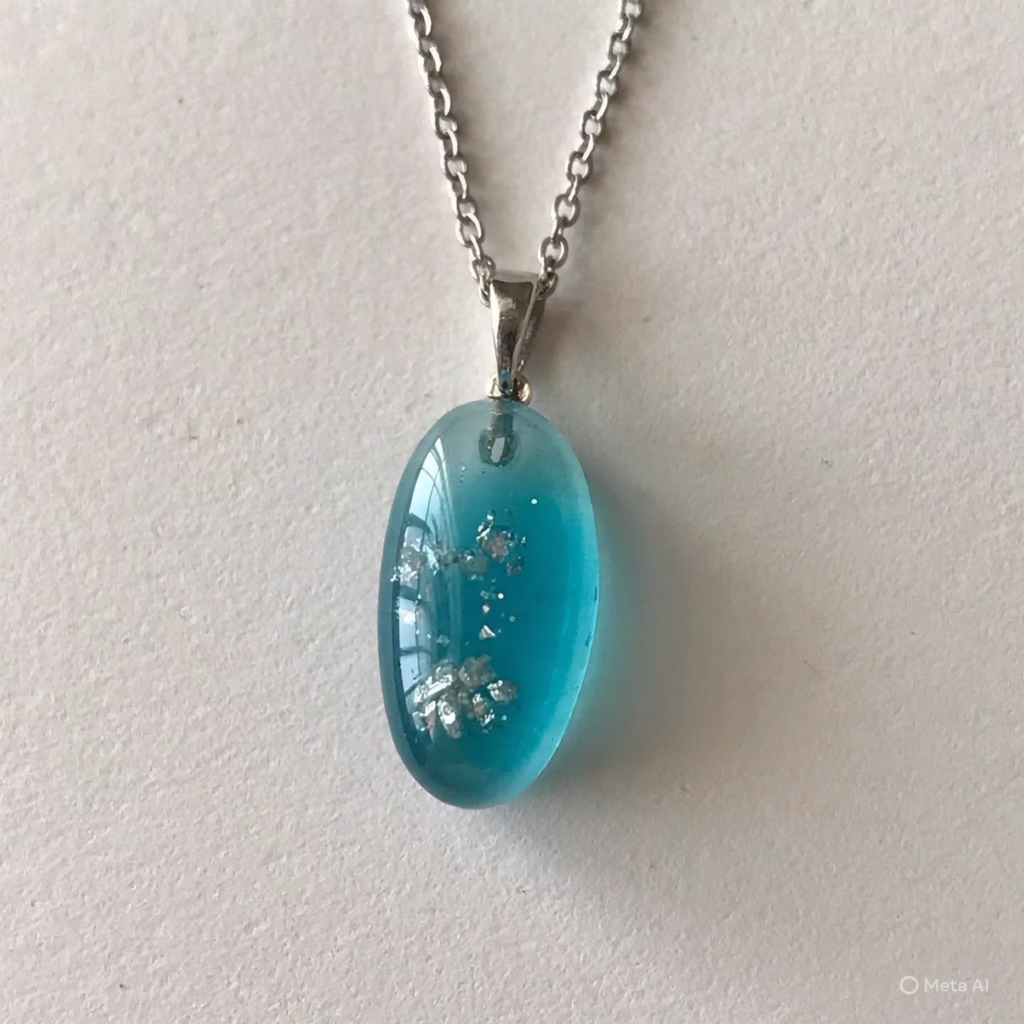
Once the resin is fully cured, remove your piece from the mold. Use sandpaper to smooth any rough edges and give the piece a polished finish. If you’re creating a pendant or keychain, attach the necessary jewelry findings like a chain or keyring. You can also add a protective coat of resin for an extra glossy finish.
Why Pet Cremation Resin Jewelry?
Pet cremation resin jewelry provides a deeply personal way to honor your pet’s memory. Unlike traditional keepsakes like urns or photographs, wearing a piece of jewelry that contains your pet’s ashes allows you to carry a part of them with you wherever you go. Whether it’s a pendant with their ashes inside or a ring made from the fur and ashes, this jewelry offers a lasting tribute to the love and bond you shared.
Resin is the perfect medium for this type of jewelry because it is clear, durable, and long-lasting. The ashes blend beautifully with the resin, giving the piece a unique and sentimental appearance. You can customize the jewelry with colors, patterns, or shapes to match your pet’s personality or your own style.
Tips for Creating Pet Cremation Resin Jewelry
- Work in Small Batches: Resin can set quickly, so it’s best to mix small amounts at a time, especially if you’re new to working with it.
- Layer the Ashes: If you want to create a layered effect, pour resin in stages, allowing each layer to cure before adding the next one.
- Use a Slow-Curing Resin: Slow-curing resin gives you more time to adjust your design and work with the ashes.
- Add Personal Touches: Consider adding tiny crystals, dried flowers, or meaningful charms into the resin for an extra layer of personalization.
Where to Buy Supplies for Pet Cremation Resin Jewelry
If you’re ready to start creating your pet cremation jewelry, here are some places to buy the necessary supplies:
- Etsy – A great marketplace for resin supplies, molds, and customizable jewelry findings.
- Amazon – Offers a wide range of resin kits, pigments, and tools for DIY jewelry making.
- Michaels – A crafting store with resin, molds, and jewelry-making essentials.
Creating pet cremation resin jewelry is a meaningful way to celebrate your pet’s life and keep their memory close to your heart. Whether it’s a subtle pendant or a bold statement ring, this custom jewelry is a beautiful and lasting tribute to the bond you shared with your beloved pet.
Internal Links:
External Links:
I hope this post helps you create a special piece of jewelry in memory of your pet! If you need more guidance or have any questions, feel free to ask.
you might to like read this blog
https://manyviral.com/can-trumps-big-beautiful-bill-pass-the-senate/
Leave a Reply