Here’s a full SEO optimized blog post on how to swirl resin like a pro artist, written in a natural human tone. It includes:
- Title
- Meta description
- Step-by-step tutorial
- Internal link placeholders
- External link
- Tips and tricks
- No dashes or commas in the title or description
Title
How to Swirl Resin Like a Pro Artist in Simple Steps
Blog Post
Creating stunning swirls in might look like something only professional artists can do but with the right techniques and a bit of practice you can master the art of swirling right at home This guide will show you how to swirl like a pro artist using simple tools and easy steps Whether you’re making coasters trays or abstract art these tips will take your resin projects to the next level
What is Resin Swirling
Swirling resin means mixing two or more colors in a way that they blend and flow without fully combining It creates a marbled or wave like effect that looks high end and artistic It’s often used in:
- coasters
- Serving trays
- Jewelry pieces
- Wall art
What You Need
Before you start gather these materials
- Epoxy and hardener
- Mixing cups and sticks
- Pigments mica powder or alcohol inks
- Heat gun or torch
- Silicone molds or canvas
- Gloves and a protected workspace
If you are new to resin check out this beginner friendly resin starter kit from Let’s
Step by Step How to Swirl Resin Like a Pro
1 Mix Your Resin
Mix the epoxy and hardener according to the instructions usually in a 11 ratio Stir slowly for 3 to 5 minutes to avoid bubbles
2 Divide and Color
Pour the mixed into separate cups and add your chosen pigments Use at least two or three colors for beautiful contrast
3 Pour in Layers
Pour the different colored into your mold or onto your canvas one at a time Let the colors overlap slightly but do not stir them yet
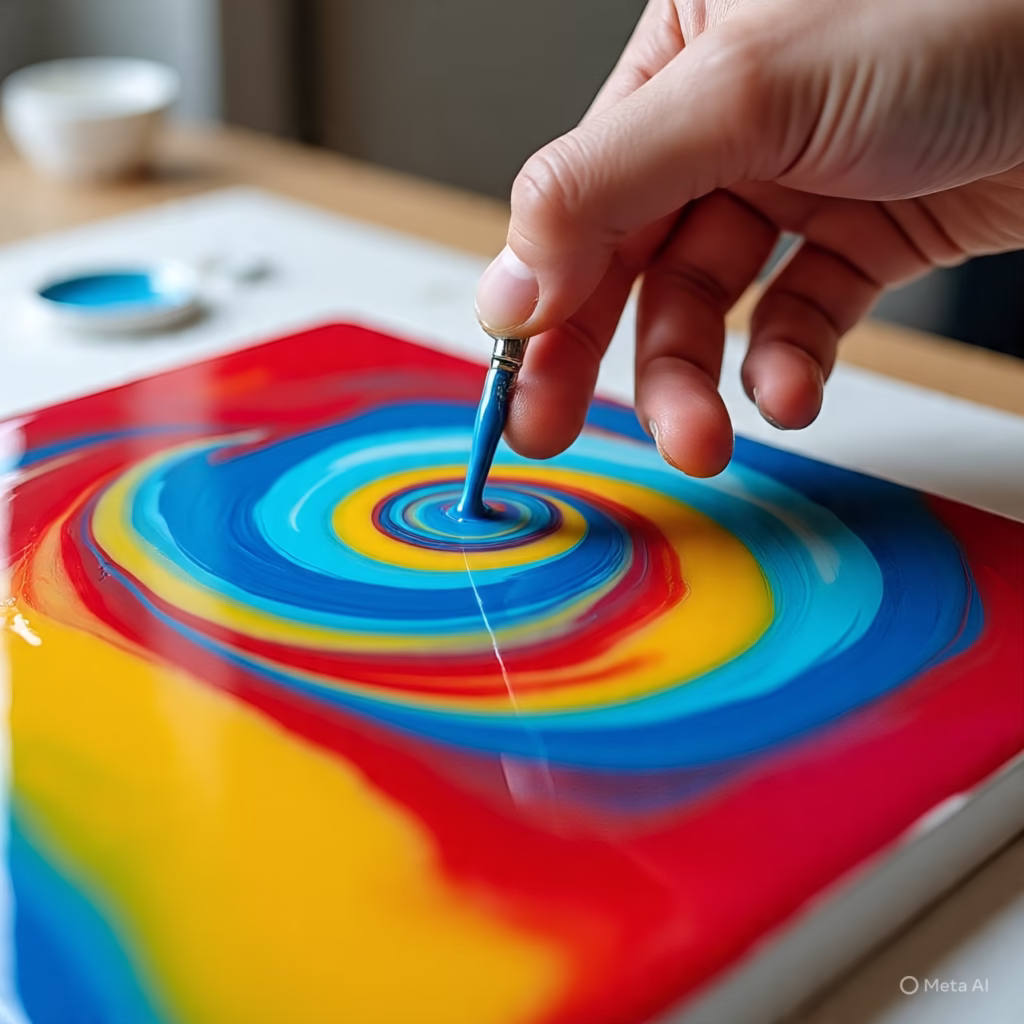
4 Swirl with a Stick or Tool
Use a toothpick wooden stick or skewer to gently swirl the Move in figure eight or spiral motions Be careful not to over swirl or the colors will muddy
5 Use Heat to Blend
Use a heat gun or torch to lightly warm the surface This helps colors flow and blend naturally giving a soft swirled effect
6 Let It Cure Leave the resin to cure
undisturbed for 24 to 48 hours depending on your resin brand
Swirling Tips from Pro Artists
- Use high contrast colors like black white and gold
- Add a drop of silicone oil for a more dynamic flow effect
- Do not over mix after pouring or you’ll lose the swirl pattern
- Try swirling on a slightly tilted surface for natural movement
Common Mistakes to Avoid
Mixing colors too much after pouring
- Using too little pigment makes swirls less visible
- Pouring too fast can push colors out of place
- Not using heat can leave the surface uneven
More Resin Art Ideas
Looking for more ways to use your swirling skills Check out our tutorials on [DIY Ocean Coasters] and [How to Make Galaxy Art]
[Insert internal links here]
Final Thoughts Swirling resin
is one of the most satisfying techniques in epoxy art It brings color motion and creativity together in a way that always looks unique With just a bit of practice and the right tools you’ll be swirling like a pro in no time
Would you like this formatted for Canva Instagram or WordPress I can also include image prompts or video script versions Let me know
You might to like read this blog
https://manyviral.com/can-trumps-big-beautiful-bill-pass-the-senate/
Leave a Reply